 I needed a new bag for my Brompton bike. All the bags were very expensive, £70 for the basic bags so I did what any maker would do and started on the journey to make my own bag. There was a few challenges:
1 . Find a way to connect the bag to the front carrier block securely.
- Find a cheaper bag that i could modify easily and thats water proof
- Work out if anything else was need, e.g. bag strengthening.
I started by look on thingiverse for 3D printed Brampton carrier block, its always a good place to start to see how other people have attacked the problem. I didn’t find anything. I set work to design one myself using fusion 360 – Matt SB gave me a helping hand to get started with as its the first functional 3d object I’ve printed. I came up with the item below after a few iterations printed on my Aldi 3D printer.
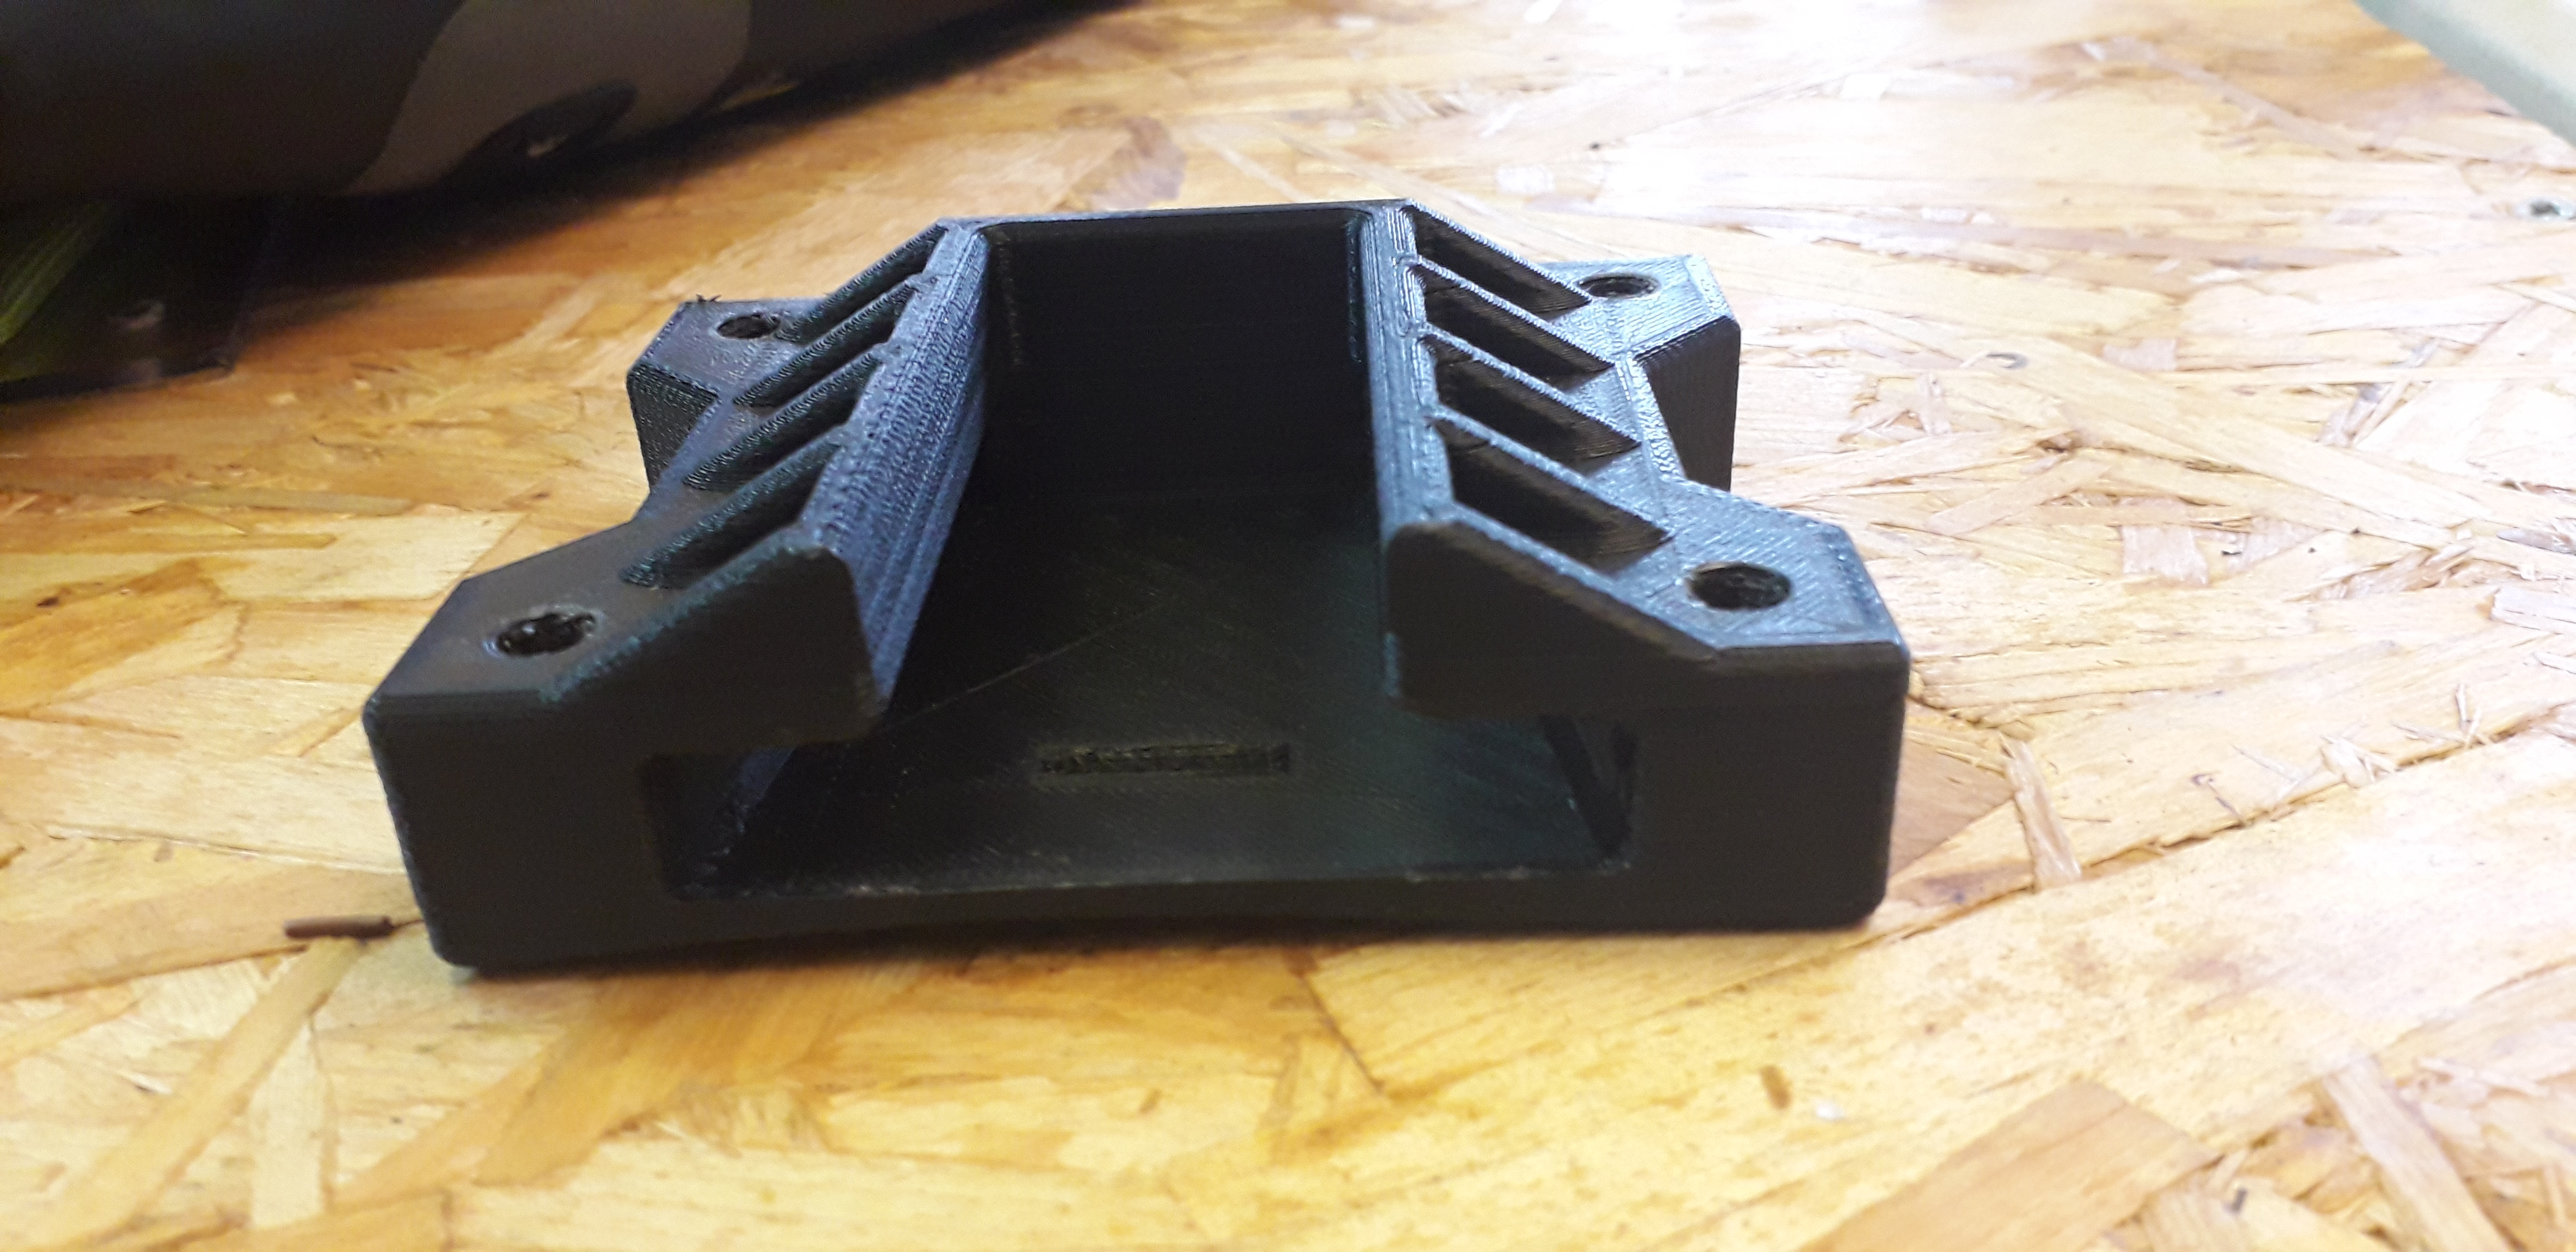 front carrier block.
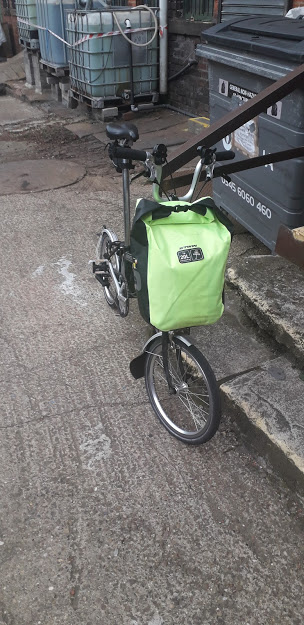
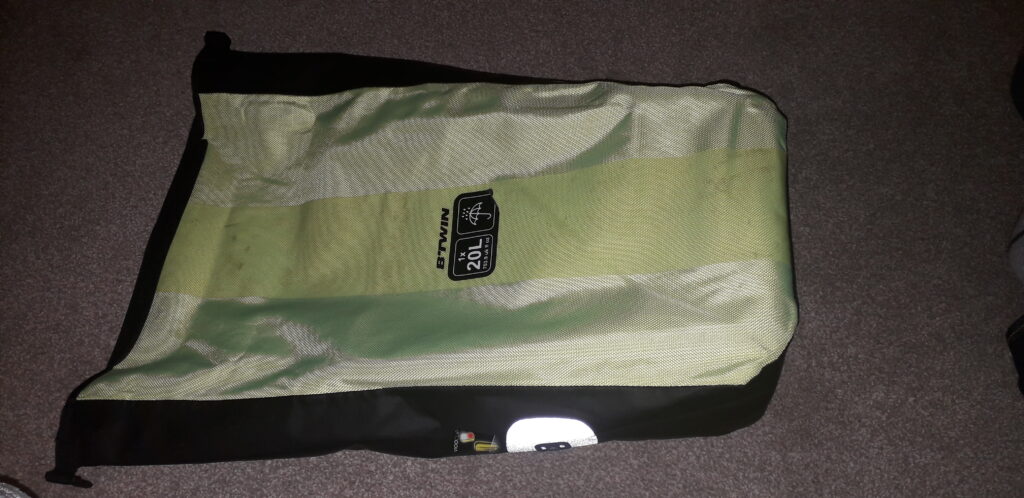
The next challenge was to find a bag. I search on the internet and i purchased a bag from aliexpress for £4 to test the process out. The test went fine and I used the bag for about a year but the wear and tear took its toll on the bag so I bought a better quality bag from decathlon shown below. This is the bag that i will describe on the rest of the blog.
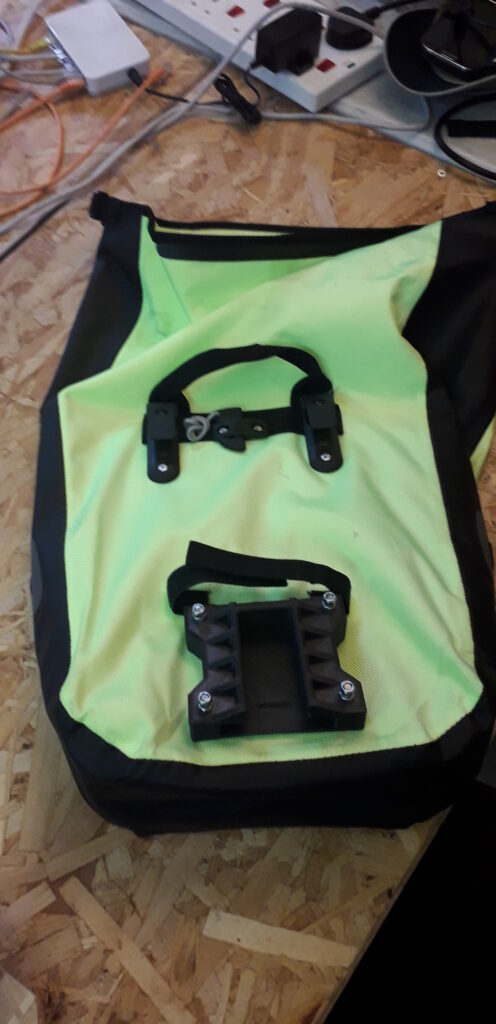
 I’ve got the carrier block designed and the water proof bag. Now I need to attach everything and make sure it wont damage the bike/contents of the bag. The back board in the bag was a bit bendy and I’m carrying my laptop to and from work so I wanted it to get there and back in one piece. To strengthen the back I bought a A3 clear polycarbonate makrolon plastic panel Sheet 3mm thick from ebay. This went down the back of the bag to strengthen it. I sawed it to shape to start with and then bent it using the hot gun in the hackspace. This gave the bottom of the bag something solid so the laptop or other items in the bag wouldn’t sag and hit the front wheel. I also added some neoprene foam to the bottom of the plastic sheet to cushion any items put in the bag.
![]() The next task was to attach the bag to front carrier block. I did this using a hand drill and screwed it together.
The next task was to attach the bag to front carrier block. I did this using a hand drill and screwed it together.
 I wanted a separate area for the bag.